

Table of Contents
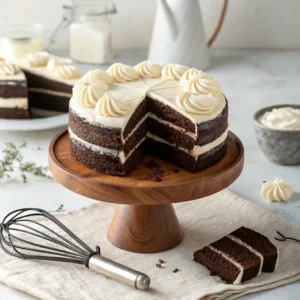
There’s something magical about a chocolate cake with vanilla frosting. It’s a classic combination that never fails to delight.
This cake is more than just a dessert. It’s a symbol of celebration, a comfort food, and a testament to your baking skills.
In this comprehensive guide, we’ll explore the art of making a decadent chocolate cake with creamy vanilla frosting. We’ll delve into the importance of quality ingredients, the science behind the baking process, and the techniques that ensure a moist, flavorful cake and a smooth, rich frosting.
Whether you’re a seasoned baker or a novice in the kitchen, this guide is designed to inspire and educate. By the end, you’ll be equipped with the knowledge and confidence to create a stunning chocolate cake that’s sure to impress.
So, let’s embark on this delicious journey together. After all, who can resist the allure of a perfectly baked chocolate cake adorned with a layer of creamy vanilla frosting?
The Allure of Chocolate Cake with Creamy Vanilla Frosting
Chocolate cake with vanilla frosting is a timeless pairing. It brings together the rich, deep flavors of chocolate with the light sweetness of vanilla. The result is a delightful balance of tastes that satisfies both chocolate and vanilla lovers.
The cake’s texture is key to its allure. A moist chocolate crumb that melts in your mouth complements a smooth, creamy frosting. This contrast in texture elevates the eating experience to something truly memorable.
Beyond its flavor and texture, this combination holds a special place in many hearts. It’s often present at birthdays, weddings, and celebrations. Its versatility makes it a staple dessert for various occasions and settings.
Nostalgia also plays a significant role in its appeal. Many people recall childhood memories of savoring a slice during family gatherings. Such memories contribute to its enduring popularity as a comfort dessert.
Lastly, the visual appeal of a well-decorated chocolate cake with vanilla frosting cannot be overstated. The stark contrast between the dark cake and the pale frosting makes for an eye-catching centerpiece at any event. This visual allure can be further enhanced with creative decorations and garnishes.
Selecting Quality Ingredients
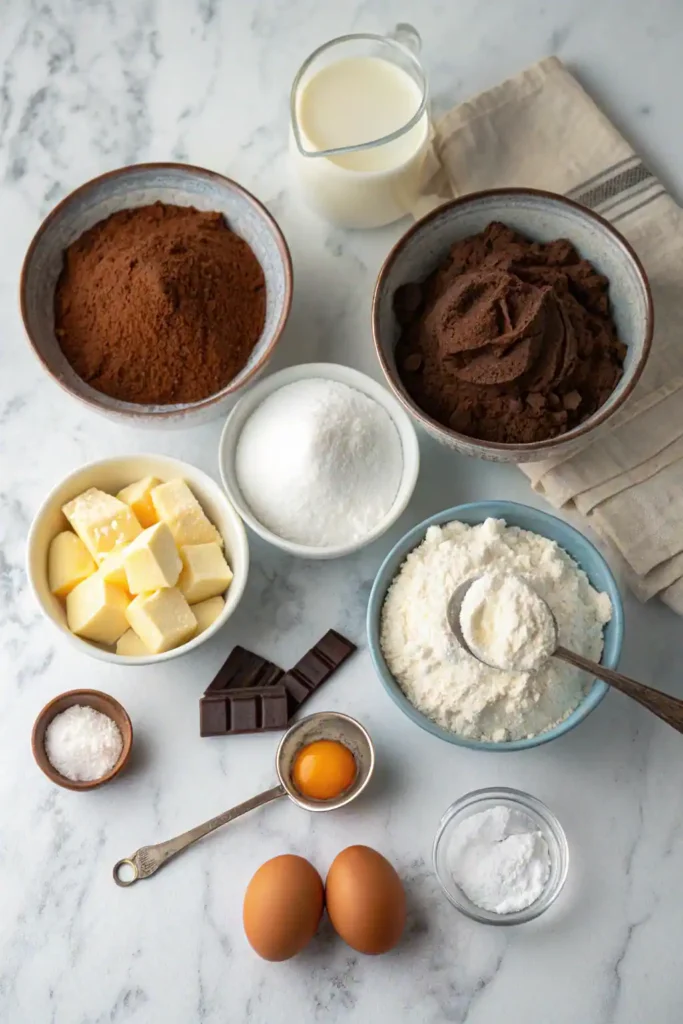
Quality ingredients make a big difference in baking. They impact both flavor and texture. For chocolate cake, rich cocoa powder is essential. It provides depth and enhances the chocolate flavor.
Choose a cocoa powder labeled “Dutch-processed” for a smoother taste. Natural cocoa works too, but it’s more acidic and has a slightly different flavor. Always use fresh cocoa powder for the best results.
Flour is another key player. All-purpose flour is usually your go-to in baking. It yields a tender crumb, ideal for cakes. Sift your flour to avoid lumps and ensure even mixing.
For the frosting, pure vanilla extract elevates the taste. Avoid imitation vanilla, as it lacks depth. Real vanilla offers a richer, more authentic flavor.
Butter adds richness to both cake and frosting. Opt for unsalted butter, allowing control over the salt content. Quality butter results in a moist cake and velvety frosting.
Step-by-Step Chocolate Cake Recipe
Creating a chocolate cake with vanilla frosting requires patience and precision. Follow this detailed recipe for success. Gather your tools and ingredients before starting. Preparing ahead makes the process smooth and enjoyable. Ready to bake? Let’s dive in!
- Ingredients:
- 1 ¾ cups all-purpose flour
- ¾ cup Dutch-processed cocoa powder
- 2 cups granulated sugar
- 1 ½ teaspoons baking powder
- 1 ½ teaspoons baking soda
- 1 teaspoon salt
- 2 large eggs
- 1 cup buttermilk
- ½ cup vegetable oil
- 2 teaspoons pure vanilla extract
- 1 cup boiling water
Preparing Your Ingredients
Begin by preheating the oven to 350°F (175°C). This ensures it’s ready when you are. Grease two 9-inch round cake pans thoroughly. Line them with parchment paper for easy removal later.
Next, gather all your ingredients in one place. It’s important to measure each ingredient accurately. Use a kitchen scale if possible; it’s more precise than cups.
Allow eggs and buttermilk to reach room temperature. This helps them mix more smoothly into the batter. Warm ingredients also ensure better texture and rise.
Sift the dry ingredients, including cocoa powder, flour, baking powder, and baking soda, into a large bowl. This step prevents clumping and ensures an even mix.
Keep your workspace clean and organized. A tidy kitchen helps reduce stress and improves focus during baking.
Mixing the Perfect Batter
In a large bowl, cream the sugar and oil together. Use a hand mixer or stand mixer for ease. Beat until it reaches a smooth consistency.

Add the eggs one at a time, beating well after each addition. This incorporates air, which helps the cake rise. The mixture should be light and creamy.
Slowly add the dry ingredients to the wet. Alternate with the buttermilk until just combined. Avoid overmixing, which can make the cake dense.
Finally, stir in the boiling water carefully. The batter will be thin; this is normal. It helps create a moist, tender cake.
Pour the batter evenly into the prepared cake pans. Smooth the tops gently with a spatula. Ensure an even distribution for consistent baking.
Baking and Testing for Doneness
Place the cake pans in the preheated oven. Position them on the middle rack for even baking. Bake for 30 to 35 minutes, but check them toward the end.
Testing for doneness is crucial. Insert a toothpick into the center of each cake. It should come out clean or with a few crumbs.
Resist the urge to open the oven door frequently. Opening it too soon can cause the cake to collapse. Wait until the last five minutes to check.
If the toothpick has batter, continue baking for a few minutes. Check again with a clean toothpick. The edges should begin to pull away from the pans.
Once baked, remove the cakes from the oven. Let them cool in the pans for 10 minutes. This short cooling period helps them release easily.
After the initial cooling, transfer cakes to wire racks. Allow them to cool completely before frosting. Frosting a warm cake can lead to melting and slipping.
Crafting the Creamy Vanilla Frosting
Creating the perfect vanilla frosting is both an art and a science. The key lies in balancing texture and flavor. Quality ingredients make a huge difference, so choose wisely.
Ingredients:
- 1 cup unsalted butter, softened
- 4 cups powdered sugar
- 1 tablespoon pure vanilla extract
- 2-4 tablespoons heavy cream or milk
- A pinch of salt
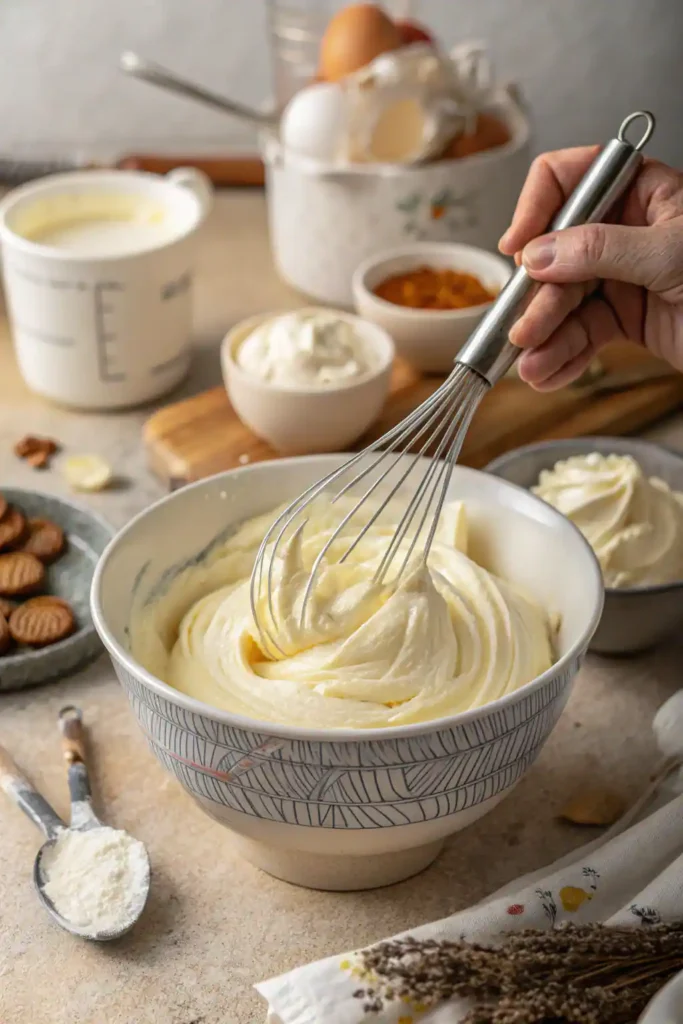
Begin by softening the butter. It should be at room temperature, pliable but not melted. This ensures a smooth mix without lumps.
Place the butter in a large mixing bowl. Beat it with a mixer until creamy. This should take about 2-3 minutes.
Gradually add powdered sugar, one cup at a time. Mix on low to avoid a sugar cloud. After each addition, beat until fully incorporated.
Add the vanilla extract and a pinch of salt. These enhance the frosting’s flavor, bringing out the sweetness without overpowering.
Pour in 2 tablespoons of cream or milk. Beat until the frosting is fluffy. If it’s too thick, add more cream, one tablespoon at a time.
Taste your frosting. Make adjustments as needed for desired sweetness. Store extra frosting in the fridge, but let it come to room temperature before using.
Achieving the Perfect Frosting Consistency
Consistency in frosting is crucial for both taste and application. Proper texture makes spreading much easier. It also helps the frosting hold its shape.
Start by using the correct ratio of butter to sugar. Too much sugar can make it too stiff; too little makes it runny.
Room temperature butter softens quickly, allowing for a smooth blend. Avoid microwaving it, which alters its consistency.
Add cream gradually. More cream gives a smoother texture but can also thin it out. Adjust according to your needs.
Mix thoroughly but don’t overbeat. Over-mixing can incorporate too much air, affecting the texture. Stop once it’s creamy and light.
A kitchen thermometer can check the softness of butter. It should ideally be between 65°F and 70°F.
To thicken runny frosting, add more powdered sugar. To thin out thick frosting, incorporate more cream.
Remember, a perfect frosting should spread easily and stay put. Test it with a spatula to see how it holds up.
Frosting Application Techniques
Applying frosting evenly is key to a professional-looking cake. A few simple techniques can make all the difference.
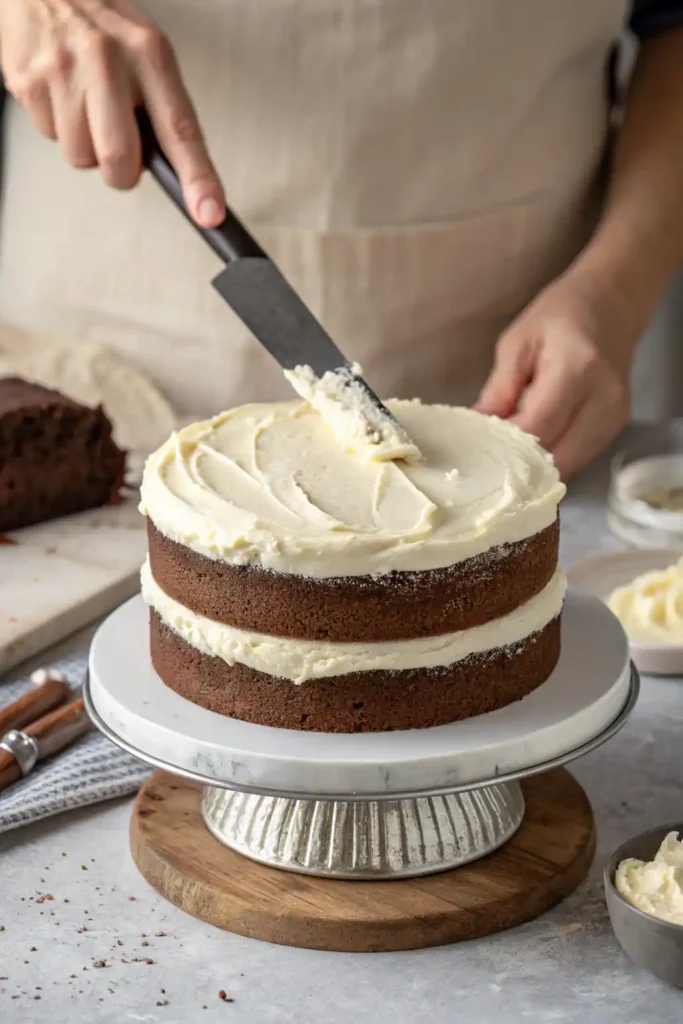
Start with a crumb coat. This thin layer seals crumbs and creates a smooth surface. Chill the cake briefly after applying.
Use an offset spatula to spread frosting. Its long blade makes smoothing easy. Work from the center outward, keeping pressure consistent.
Rotate the cake as you frost. A turntable helps achieve even coverage. Move slowly to prevent uneven layers.
Frost the sides next. Use a bench scraper for a smooth finish. Hold it vertically against the cake while turning.
If uneven spots appear, add more frosting. Fix these before the final layer sets. The goal is a flawless and seamless look.
Add decorative touches after smoothing. Piping bags create fancy borders and designs. Choose different nozzles for varied effects.
Continue to check your work from all angles. This helps catch any missed spots or uneven areas. Enjoy the process, and don’t rush.
Decorating and Customizing Your Cake
A beautifully decorated cake captivates not only the taste buds but also the eyes. There are numerous ways to make your chocolate cake stand out. Begin with a simple design or embrace a detailed masterpiece.
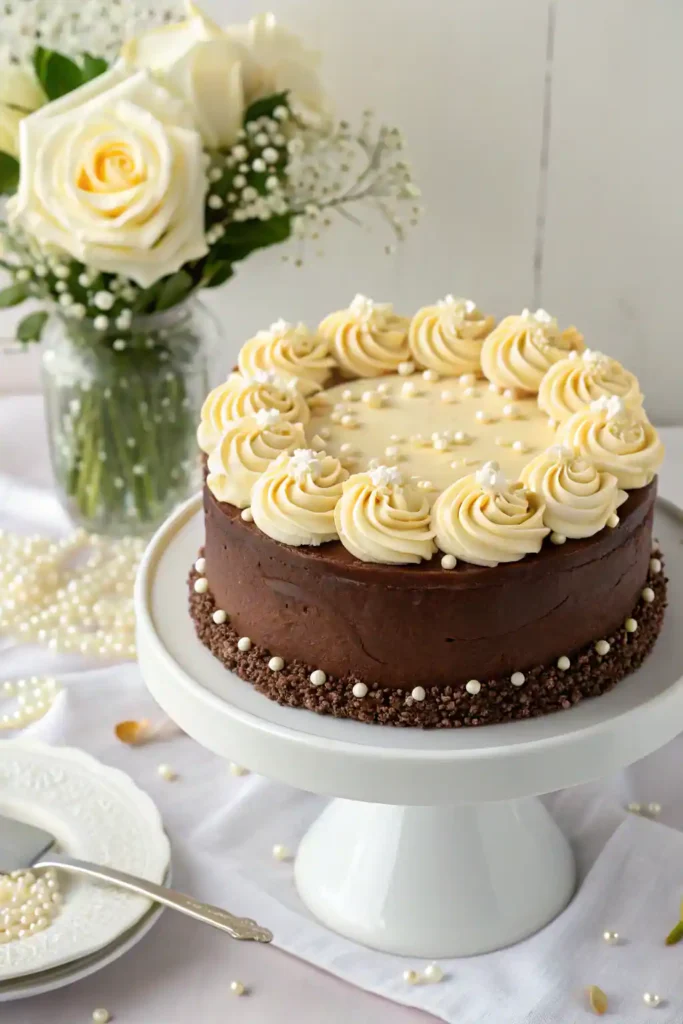
Experiment with various piping techniques. Create rosettes, swirls, or elegant borders. To do this, you’ll need piping bags and a selection of nozzles.
Textures add visual interest. Use the back of a spoon to create gentle waves. Run a fork across the surface for a rustic finish.
Add sprinkles or edible glitter for a touch of whimsy. Fresh fruit slices work well too, adding color and freshness.
Creating a theme adds a personal touch. Think seasonal flavors or holiday color schemes. For chocolate lovers, a drizzle of ganache never fails to impress.
You might consider using food coloring for custom shades. Natural colorings from fruits or vegetables can provide subtle hues.
For a more complex design, consider adding layers. Alternate fillings within the layers for surprise flavors. Chocolate chips or nuts can add delightful texture.
Customizing Ideas:
- Add a drizzle of caramel or sauce
- Use fresh flowers for a sophisticated look
- Incorporate candy toppings for a fun twist
- Experiment with different frosting colors
- Create a tiered cake for special occasions
Let creativity guide your decorating journey. Each cake can tell a story through its design. Share your creation with others, sparking joy and inspiration.
Storing and Making Ahead
Proper storage ensures your cake remains fresh. After frosting, cover the cake lightly with plastic wrap. This prevents the frosting from getting damaged.
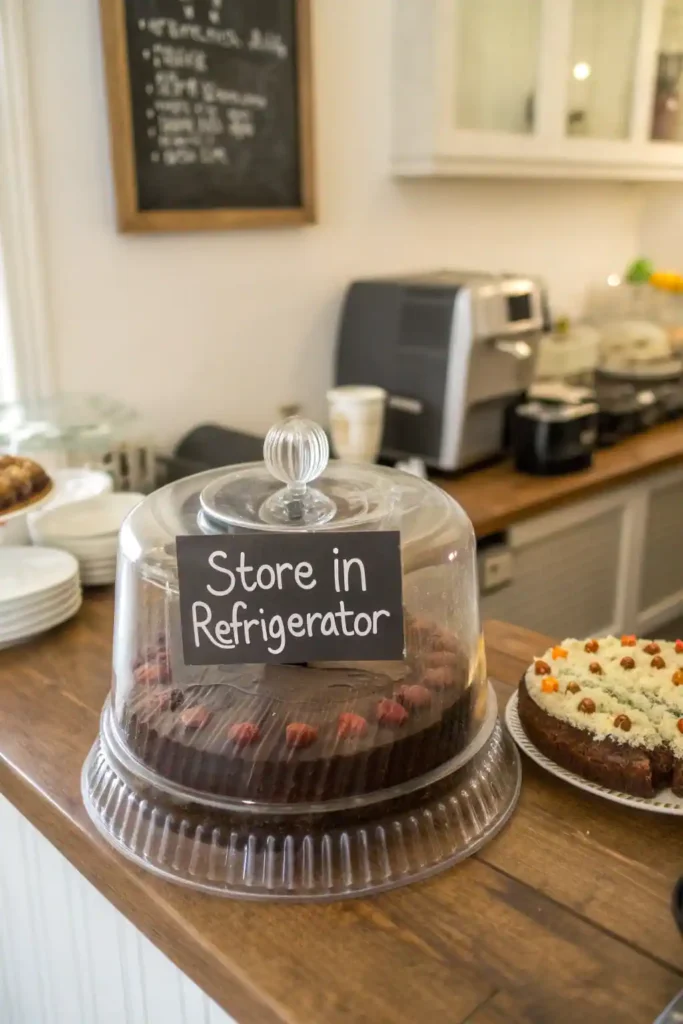
Refrigeration is key for freshness. Place the cake in the refrigerator if planning to enjoy it later. A cake dome can also protect it while refrigerated.
If you wish to prepare ahead, the layers can be baked in advance. Once cooled, wrap each layer tightly with plastic wrap. Store them in the freezer until you are ready to frost.
Thaw the cake layers in the refrigerator overnight. This ensures they return to room temperature slowly. It helps maintain their texture.
Frosting can also be made ahead and stored. Keep it in an airtight container in the refrigerator. Allow it to soften before using, ensuring easy application.
Serving and Pairing Suggestions
Serve your chocolate cake at room temperature. This allows the flavors to fully emerge. The frosting will be creamy and soft.
Pair the cake with a scoop of vanilla ice cream. The cold and creamy texture complements the rich chocolate. It’s a classic combination that pleases most palates.
A cup of hot coffee or tea can enhance the cake experience. The warmth balances the sweetness. Choose a brew with complementary notes, such as vanilla or hazelnut.
For a festive touch, add fresh berries. Raspberries or strawberries add a pop of color and tartness. They look beautiful atop a slice of cake.
A dollop of whipped cream adds an airy element. It lightens each bite without overwhelming the palate. Consider adding a dash of cinnamon for extra flavor.
Dietary Adaptations and Alternatives
Adjusting the cake for dietary needs is simple. To make it gluten-free, use a gluten-free flour blend. Ensure the blend contains xanthan gum for structure.
For vegans, substitute eggs with flaxseed meal. Mix one tablespoon of flaxseed meal with three tablespoons of water for each egg. Allow the mixture to sit and thicken.
Dairy can be replaced with plant-based alternatives. Almond, soy, or oat milk works well in the batter. Use vegan butter for the frosting.
Reduce sugar for a less sweet cake. Substitute half the sugar with a natural sweetener like Stevia. This also lowers calories.
For nut allergies, ensure all ingredients are nut-free. Read labels carefully, as cross-contamination is common. Choose nut-free vanilla extract and buttermilk.
Experiment with coconut sugar for a unique taste. It adds a caramel-like note to the cake. This sugar also offers a lower glycemic index.
Soy yogurt can replace buttermilk for creaminess. It helps to keep the cake moist and flavorful. This works well in both vegan and non-vegan recipes.
Consider adding spices like cinnamon for depth. A teaspoon can bring warmth to your cake. Enjoy the chance to personalize your dessert.
Troubleshooting Common Baking Issues
Sometimes cakes sink in the middle, a common problem. This can be caused by opening the oven too early. Wait until the cake is nearly done before peeking.
If your cake is too dry, check the oven temperature. An overheated oven can cause this issue. Ensure your oven is calibrated accurately to prevent overbaking.
A dense cake might result from overmixing. Mix only until ingredients are combined. This helps maintain a light, airy texture.
Cake stuck to the pan? This often results from neglecting to grease and line the pan. Use parchment paper and butter to avoid sticking.
Lastly, uneven layers can occur if the batter is not evenly distributed. Use a spatula to spread the batter evenly before baking. This ensures a uniform rise.
The Cultural Significance of Chocolate Cake
Chocolate cake has long been a symbol of celebration. From birthdays to weddings, it often graces significant life events. Its rich, indulgent flavor makes it a crowd favorite.
In American culture, it is a staple at various gatherings. The combination of chocolate cake with vanilla frosting is particularly beloved. It offers a perfect balance of flavors.
Globally, chocolate cake has numerous cultural versions. Each variation reflects local tastes and ingredients. Yet, the core idea remains universally cherished.
The cake’s history dates back to the 18th century. Over time, it has evolved, showcasing creativity in baking. Today, it represents comfort and luxury.
Beyond celebrations, chocolate cake embodies a sense of nostalgia. Many people recall childhood memories associated with it. Thus, it holds a special place in hearts worldwide.
Chocolate Cake with Creamy Vanilla Frosting
Ingredients
Chocolate Cake Ingredients
- 1 ¾ cups all-purpose flour
- ¾ cup Dutch-processed cocoa powder
- 2 cups granulated sugar
- 1 ½ teaspoons baking powder
- 1 ½ teaspoons baking soda
- 1 teaspoon salt
- 2 large eggs
- 1 cup buttermilk
- ½ cup vegetable oil
- 2 teaspoons pure vanilla extract
- 1 cup boiling water
Creamy Vanilla Frosting Ingredients
- 1 cup unsalted butter softened
- 4 cups powdered sugar
- 1 tablespoon pure vanilla extract
- 2 –4 tablespoons heavy cream or milk
- A pinch of salt
Instructions
Step-by-Step Instructions for the Chocolate Cake
- Preheat and Prepare Pans
- Preheat oven to 350°F (175°C).
- Grease two 9-inch round cake pans and line with parchment paper.
- Measure and Prep Ingredients
- Gather all ingredients.
- Bring eggs and buttermilk to room temperature.
- Sift flour, cocoa powder, baking powder, and baking soda together.
- Mix Wet Ingredients
- In a large bowl, beat together sugar and vegetable oil until smooth.
- Add eggs one at a time, beating well after each.
- Mix in the vanilla extract.
- Combine Wet and Dry Ingredients
- Gradually add sifted dry ingredients, alternating with buttermilk, mixing just until combined.
- Stir in the boiling water carefully. Batter will be thin—this is normal.
- Bake the Cakes
- Divide batter evenly into prepared pans.
- Bake for 30–35 minutes or until a toothpick inserted in the center comes out clean.
- Let cakes cool in the pans for 10 minutes, then transfer to wire racks to cool completely.
Step-by-Step Instructions for Creamy Vanilla Frosting
- Soften the Butter
- Ensure butter is at room temperature—soft but not melted.
- Beat the Butter
- In a large mixing bowl, beat butter until smooth and creamy (2–3 minutes).
- Add Powdered Sugar Gradually
- Add powdered sugar one cup at a time, beating on low speed to incorporate.
- Add Vanilla, Salt, and Cream
- Mix in vanilla extract and a pinch of salt.
- Add 2 tablespoons of heavy cream or milk and beat until fluffy.
- Adjust consistency with more cream (to thin) or powdered sugar (to thicken).
Assemble the Cake
- Level and Layer
- If needed, level the cake layers.
- Place one layer on a cake stand or plate.
- Frost and Stack
- Spread an even layer of frosting on the first cake layer.
- Place the second layer on top and press down gently.
- Crumb Coat and Final Frosting
- Apply a thin crumb coat and chill for 15–20 minutes.
- Frost the top and sides smoothly using an offset spatula or bench scraper.
- Decorate (Optional)
- Pipe borders, add sprinkles, fruit, or drizzle ganache as desired
Notes
Nutrition Information (Per Serving)
| Nutrient | Amount |
| Calories | ~480 kcal |
| Total Fat | 22g |
| Saturated Fat | 13g |
| Carbohydrates | 66g |
| Sugar | 48g |
| Protein | 5g |
| Fiber | 3g |
| Cholesterol | 70mg |
| Sodium | 340mg |
Conclusion and Invitation to Share
Baking a chocolate cake with vanilla frosting is a fulfilling experience. The process combines creativity, skill, and patience. Each slice offers more than just flavor; it brings happiness.
This classic dessert can transform any occasion into a special event. The harmonious balance of rich chocolate and creamy vanilla is a delightful treat. It’s a recipe worth passing down through generations.
We hope this guide has inspired your baking adventures. Whether you’re a novice or a seasoned baker, there’s always room to experiment. Add your own twist to make it uniquely yours.
Sharing your creation can bring immense joy to others. Consider making one for a family gathering or a friend’s birthday. The thoughtful gesture will surely be appreciated.
Finally, we invite you to share your success and variations of this cake. Post your photos and stories online or within your baking community. Let’s spread the love of this sweet tradition together.
Frequently Asked Questions
Can I make vanilla frosting without butter?
Yes, you can make vanilla frosting without butter by using alternatives like margarine, shortening, or even cream cheese. Each will slightly change the flavor and texture. Coconut oil can also work for a dairy-free option, though it may make the frosting softer at room temperature.
How long does chocolate cake last in the fridge?
Chocolate cake can last up to 5 days in the refrigerator when stored in an airtight container. To keep it moist, wrap the cake layers in plastic wrap or foil before refrigerating. Bring to room temperature before serving for the best texture.
Can I freeze chocolate cake with frosting?
Yes, chocolate cake with frosting freezes well. Place the cake in the freezer uncovered for 1–2 hours to harden the frosting, then wrap tightly in plastic wrap and foil. It can be frozen for up to 3 months. Thaw overnight in the fridge, then bring to room temperature before serving.
What is the best cocoa powder for chocolate cake?
For a rich, deep chocolate flavor, use Dutch-processed cocoa powder. It’s less acidic than natural cocoa and results in a smoother taste. However, if your recipe uses baking soda, natural cocoa powder is preferred for proper leavening.
How do you make chocolate frosting more spreadable?
If your chocolate frosting is too stiff, add 1–2 teaspoons of milk or cream at a time until it reaches a spreadable consistency. You can also warm it slightly (5–10 seconds in the microwave) to soften it — just be careful not to melt it.
What icing goes well with chocolate cake?
Vanilla frosting is a classic pairing, but chocolate cake also tastes amazing with cream cheese frosting, mocha buttercream, peanut butter frosting, or even salted caramel frosting. The choice depends on your flavor preferences and the occasion.
2 thoughts on “Chocolate Cake with Creamy Vanilla Frosting”